Best rig for bottom fishing for fluke
There's nothing quite like the thrill of feeling that distinct "thump" of a doormat fluke hitting your line, but let's be honest, getting them to bite consistently can sometimes feel like a puzzle. One of the biggest keys to unlocking more fluke catches, especially when you're targeting them on the bottom in places like Long Island Sound, is having the right rig. This guide is all about demystifying the best setups for bottom fishing fluke, so you can spend less time guessing and more time reeling in those delicious flatfish.
Deciphering Fluke Behavior and Why Your Rig Matters
Before we even talk about hooks and sinkers, it’s crucial to understand the fish we’re after. Fluke, also known as summer flounder, aren't like your typical active predators chasing down bait across the water column. They have a specific way of hunting, and knowing that will inform every decision you make about your rig.
The Ambush Predator Strategy: How Fluke Hunt
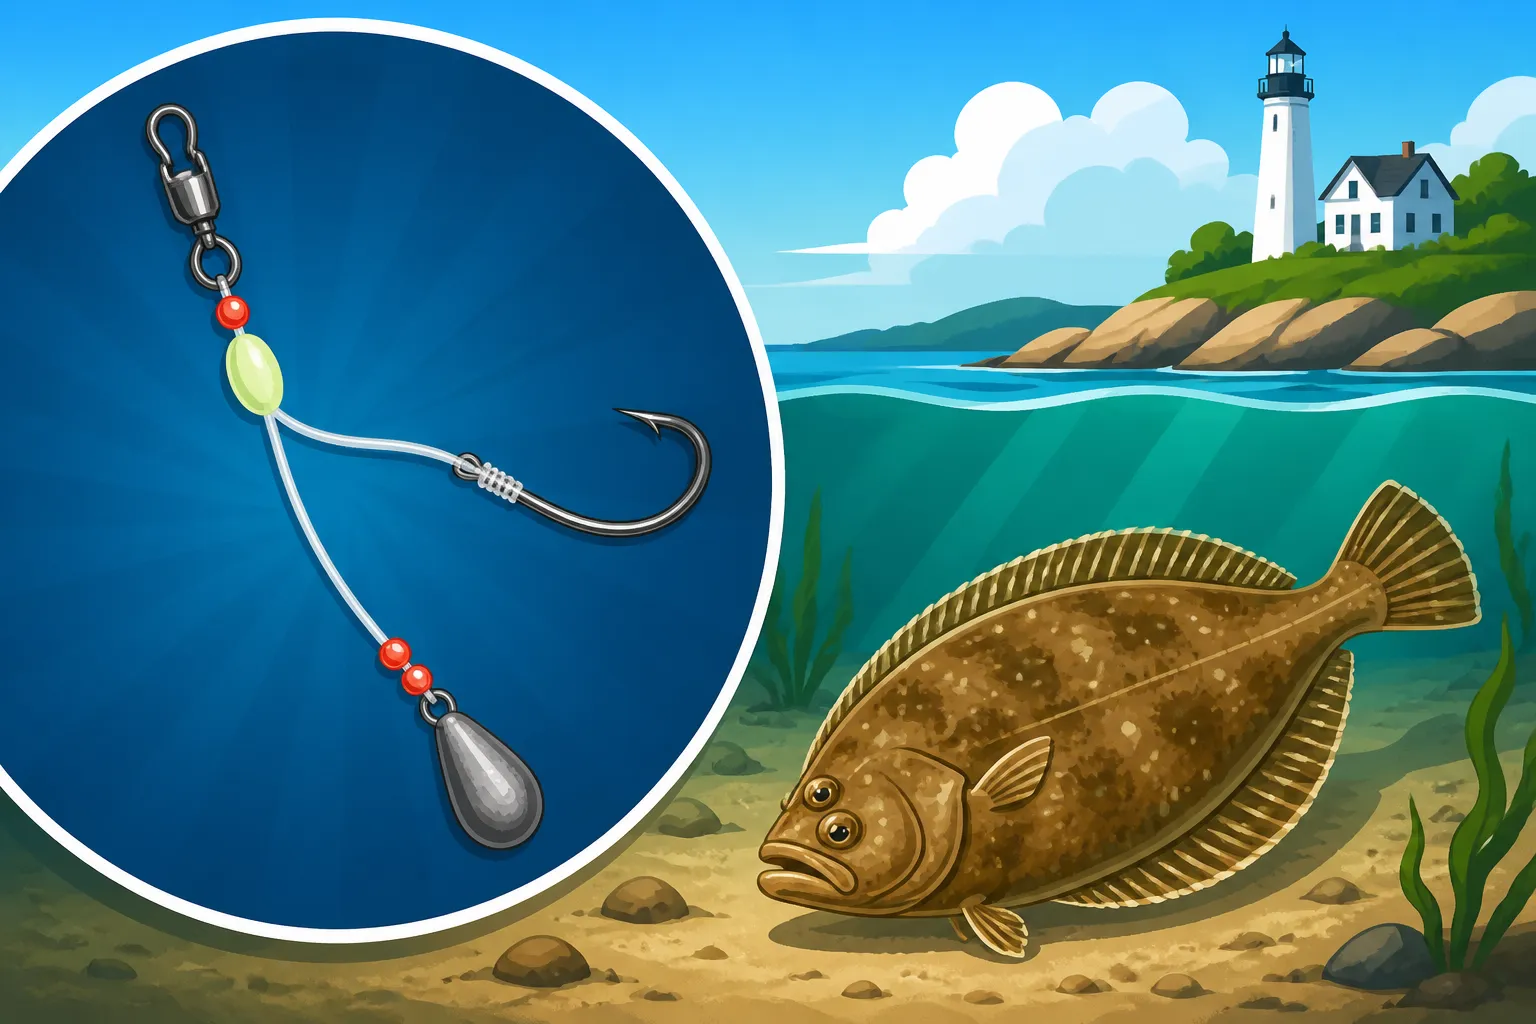
Imagine a chameleon, perfectly camouflaged, waiting patiently for its prey to wander by. That's essentially a fluke's modus operandi. They are ambush predators, meaning they spend most of their time lying flat on the seabed, buried slightly in the sand, mud, or gravel, with only their eyes peeking out. When a tasty morsel, like a baitfish or a squid, swims overhead, they'll erupt from their hiding spot with a burst of speed, engulfing their meal in one swift motion.
This "lie-and-wait" tactic tells us a lot about what makes a good fluke rig. It needs to present your bait right in their strike zone – which is typically very close to the bottom. If your bait is too high, it might go unnoticed. If it's constantly snagging, you'll spook them. Furthermore, their eyes are on top of their head, designed to spot prey above them. This means a bait presented slightly off the bottom, or dragging along it, is far more likely to get their attention than something suspended high in the water column. Understanding this predatory behavior is the bedrock of choosing and deploying the most effective fluke rigs.
Prime Fluke Hideouts: Understanding Their Preferred Habitat
Fluke aren't just any bottom dwellers; they have very specific preferences when it comes to where they set up their ambushes. Knowing these prime hideouts will help you position your boat (or yourself, if you’re fishing from shore) to put your rig right where the fish are. They generally favor areas with a mix of structure and soft bottom, places where they can blend in and find food.
Think about transition zones: where sand meets rock, where a gravel bar drops off into a muddy channel, or the edges of mussel beds. These are natural congregation points for their prey and offer excellent camouflage. Channels, especially those with good current, are also hotspots. The moving water brings bait to them, and the channel edges provide natural ambush points. Deeper holes within these channels, particularly during warmer months, can also hold larger fluke. As the water warms, fluke tend to move to deeper, cooler areas, so don't be afraid to target those deeper channels and drop-offs in the summer. Conversely, in the spring and fall, they might be found in shallower flats as they migrate. You can learn more about Fluke Habits in Long Island Sound to really dial in your fishing spots.
Building the Perfect Fluke Rig: Components and Assembly
Okay, now that we're thinking like a fluke, it's time to talk hardware. Crafting the right rig isn't just about slapping some tackle together; it's about choosing components that work in harmony to present your bait effectively and stand up to a hard-fighting flatfish.
Choosing Your Essential Terminal Tackle
Every great fluke rig starts with quality terminal tackle. These are the unsung heroes that connect you directly to the fish.
- Hooks: This is probably the most debated component! For fluke, a sharp, strong hook is non-negotiable. Many anglers swear by wide-gap hooks, often in sizes ranging from 2/0 to 5/0, depending on the bait size and target fluke. Wide-gap hooks, like an Octopus hook, allow the bait to sit naturally and expose more of the hook point for better penetration into a fluke's bony mouth. Some anglers prefer Kahle hooks for their unique shape, which also aids in a good hookset. Circle hooks are also growing in popularity, especially for those looking to practice catch and release, as they tend to hook fish in the corner of the mouth, causing less damage. Brands like Gamakatsu and Owner are popular choices you can easily find on Amazon. Regardless of the style, ensure they are chemically sharpened for optimal performance.
- Sinkers: The weight of your sinker is critical and will depend entirely on the depth, current, and wind conditions you're facing. The goal is to get your rig to the bottom and keep it there while allowing for a natural drift. Common sinker shapes include bank sinkers, pyramid sinkers, and flat "coin" sinkers. Bank sinkers are versatile, pyramid sinkers dig into soft bottoms to slow drift, and flat sinkers are great for faster drifts as they skip along the bottom. You'll want to carry a variety of weights, from 1 ounce up to 6 or even 8 ounces, especially when fishing in deeper waters or stronger currents in places like the mouth of the Connecticut River or offshore spots in Long Island Sound. Too light, and your rig won't get down or will drift too fast; too heavy, and you'll miss the subtle bites.
- Swivels: High-quality swivels prevent line twist, which is a common nuisance in bottom fishing. Barrel swivels or, even better, ball-bearing swivels are essential for connecting your main line to your leader or for various rig designs. They allow your bait to spin and flutter naturally without twisting your mainline into a bird's nest. A good snap swivel can also be handy for quickly changing sinker weights without re-tying, saving you valuable fishing time.
Selecting the Right Line and Leader Material
Your choice of fishing line and leader material can make a significant difference in your fluke fishing success. It's not just about strength; it's also about sensitivity and presentation.
- Main Line: Most fluke anglers prefer braided line for their main line. Braid offers incredible sensitivity, allowing you to feel even the lightest of fluke bites – which can sometimes be just a subtle tap. It also has virtually no stretch, providing direct contact with your rig and improving hook-setting power. A 15 to 30-pound test braided line is common, often in a high-visibility color to help you monitor your line, though some prefer darker colors. Remember, because braid is so sensitive and has no stretch, it transmits every little bump and grind on the bottom, which can take some getting used to.
- Leader Material: This is where fluorocarbon truly shines for fluke. Fluorocarbon leader is nearly invisible underwater, a huge advantage when targeting wary fluke. It's also more abrasion-resistant than monofilament, which is crucial when your rig is constantly bouncing along rough bottoms, over rocks, and shell beds. Use a fluorocarbon leader in the 20 to 40-pound test range. The length of your leader will vary depending on the rig, but generally, a 2-foot to 4-foot section is common for standard bottom rigs. Some anglers even prefer a longer section, up to 6 feet, especially in very clear water or when using a single hook rig. You can purchase bulk spools of fluorocarbon leader from various brands like Seaguar or Berkley, with many options available on Amazon.
The All-Important Bait and Attractors
You can have the most perfectly tied rig, but if your bait isn't enticing, you won't catch fish. Fluke are opportunistic feeders, so offering something natural and appealing is key.
- Natural Baits: By far, the most popular and effective natural baits for fluke are strips of calamari (squid) and spearing (small baitfish). Freshness is paramount, so try to get these from a local tackle shop. Squid strips should be cut into thin, tapering strips that are 4-6 inches long and about a half-inch wide at the top, creating a "tail" that wiggles enticingly in the current. Spearing can be fished whole or as strips. Other effective baits include sand eels, killifish (mummichogs), or even strips of fluke belly (if legal and you've already caught one!). A combination of baits, often called a "fluke sandwich" – a strip of squid with a spearing or piece of Berkley Gulp! attached – is incredibly effective.
- Artificial Attractors/Teasers: Many anglers enhance their natural bait with artificial attractors. These can include brightly colored beads, small spinner blades, or artificial grubs and teasers. Teasers, often a small bucktail jig or a soft plastic grub on a separate hook above your main bait, add visual appeal and vibrations. Popular colors for teasers include chartreuse, white, pink, and glow. The extra flash or movement from a teaser can often be the trigger that convinces a hesitant fluke to strike. Berkley Gulp! baits, particularly the Gulp! Swimming Mullet or Grub, are incredibly potent, sometimes out-fishing natural bait due to their potent scent dispersion. They are a must-have in any serious fluke angler's tackle box and are widely available, including from online retailers like Amazon.
Mastering the Best Rigs for Bottom Fishing Fluke
Now that you know the individual components, let's put them together into the tried-and-true rigs that consistently catch fluke in Connecticut waters.
The Versatile High-Low Fluke Rig
The high-low rig is arguably the most popular and effective rig for bottom fishing fluke, and for good reason. It's simple, versatile, and presents two baits at different levels, increasing your chances of a strike.
- Step-by-Step Assembly:
- Start with a section of 20-40 lb fluorocarbon leader, about 3 to 4 feet long.
- Measure down about 12-18 inches from one end. Tie a dropper loop here. This will be your "high" hook. The loop should be about 3-4 inches long.
- Measure another 12-18 inches down from the first dropper loop. Tie a second dropper loop. This will be your "low" hook.
- At the very end of your leader, tie on a strong snap swivel using a Palomar knot or improved clinch knot. This is where your sinker will attach.
- Now, take your chosen hooks (2/0 to 5/0 wide-gap or Octopus hooks) and thread them through the end of each dropper loop. The loop acts as a snell, keeping the hook perfectly presented. Some anglers prefer to pre-tie snelled hooks to a short piece of monofilament and then loop that onto the dropper.
- Attach your main line to the top end of the leader (the end without the snap swivel) using a strong knot like a double uni knot or an Albright knot.
- Finally, clip your sinker onto the snap swivel at the bottom.
- When and Where to Use It: The high-low rig is your workhorse for fluke fishing. It excels when drifting over varied bottoms – sand, mud, gravel, or even rocky areas where you might snag a single hook rig. Because it presents two baits, it doubles your chances and helps you experiment with different bait combinations. For instance, you might put a strip of squid on the top hook and a spearing with a Gulp! teaser on the bottom. It's perfect for drifting along channel edges, over submerged humps, or across expansive flats in Long Island Sound. This rig allows for a good, natural drift while keeping your bait in the strike zone. You can find many pre-tied high-low rigs on Amazon if you're not into tying your own, which can be a real time-saver, especially for beginners.
- Customizing the High-Low: Don't be afraid to experiment. If you're consistently catching fluke on the bottom hook, try shortening the dropper to the top hook, or vice versa. If you're snagging too much, shorten the bottom dropper loop. Adding colored beads, small spinners, or plastic teasers just above the hooks can add extra attraction. Some anglers will even add a small foam float (often called a "fluke float") to one of the dropper loops to keep that bait suspended just a few inches higher off the bottom, giving it a more buoyant, lively presentation. This customization can be particularly effective when fluke are finicky or when fishing in areas with heavy weed growth.
Other Effective Rigs for Different Scenarios
While the high-low is a staple, there are other rigs that can be incredibly effective depending on the conditions and the mood of the fluke.
- The Traditional Three-Way Swivel Rig: This rig is a classic for a reason – its simplicity and effectiveness.
- Tie a three-way swivel to your main line.
- From one eye of the swivel, tie a short leader (12-18 inches) with your sinker attached at the end. This leader should be a lighter test than your main leader, so if it snags, you only lose the sinker.
- From the second eye, tie a longer leader (2-4 feet) with your hook and bait attached.
This rig keeps your bait elevated above the sinker, allowing it to flutter enticingly with the boat's drift. It's particularly good in areas with a lot of current where you need to get down fast, or when fishing over relatively clean, flat bottoms.
- Jig and Teaser Combos: Active Fishing for Aggressive Fluke: For anglers who prefer a more active approach, or when fluke are particularly aggressive, a jig and teaser combo is deadly.
- Tie a bucktail jig (1/2 oz to 3 oz, depending on depth and current) directly to your main line. Popular colors include white, chartreuse, and pink.
- About 12-18 inches above the bucktail jig, tie a dropper loop and attach a small teaser fly or a Gulp! grub on a snelled hook.
The idea here is to actively work the jig on the bottom with short lifts and drops, mimicking a fleeing baitfish. The teaser above adds a secondary target and visual appeal. This method is excellent for covering ground and eliciting reaction strikes. You can find high-quality bucktail jigs from brands like SPRO or Andrus, and a range of soft plastic teasers perfect for this application, often sold as part of kits on Amazon. For more on this technique, check out Jigging for Fluke in Long Island Sound.
- The Carolina Rig for Finesse Presentations: When fluke are finicky, or when fishing in shallower, clearer water where a more natural presentation is needed, the Carolina rig can be incredibly effective.
- Thread an egg sinker (1/2 oz to 2 oz) onto your main line.
- Follow the egg sinker with a plastic bead (to protect the knot from the sinker).
- Tie a barrel swivel to the end of your main line.
- From the other end of the barrel swivel, tie a long (3-6 feet) fluorocarbon leader.
- Tie your hook directly to the end of the fluorocarbon leader.
This rig allows your bait to drift freely behind the sinker, creating a very natural, weightless presentation. The sinker drags on the bottom, but the bait floats or swims enticingly above it. It's great for slower drifts and when you need maximum stealth. This is often used with live baits or larger strips of natural bait.
| Rig Type | Complexity | Ideal Conditions | Primary Benefit | Drawback |
|---|---|---|---|---|
| High-Low Rig | Moderate | Varied bottom, moderate current | Presents two baits, versatile | Can snag two hooks in very rocky areas |
| Three-Way Swivel Rig | Simple | Strong current, relatively clean bottom | Keeps bait elevated, simple to tie | Can tangle if not drifted properly |
| Jig & Teaser Combo | Moderate | Aggressive fluke, covering ground | Active presentation, attracts strikes | Requires active rod work, less effective for passive fishing |
| Carolina Rig | Simple | Finicky fluke, clear shallow water | Natural, weedless presentation | Less effective in strong currents |
Essential Strategies for Fluke Fishing Success
Having the right rig is only half the battle. How you deploy and fish that rig can drastically impact your success. Fluke fishing is an art form, and mastering these strategies will put more fish in your cooler.
Navigating Structure and Currents for Optimal Drifts
Fluke fishing is all about the drift. You're not typically anchoring up and waiting; you're letting the boat, and thus your rig, move with the current and wind over prime fluke habitat.
- Understanding the Drift: The ideal drift allows your rig to tumble and bounce naturally along the bottom, just like a piece of bait being swept along. You want to cover ground slowly enough for fluke to notice and react to your bait, but not so slowly that your bait just sits there. The "sweet spot" drift speed is usually between 0.5 to 2 knots, but this can vary. Pay attention to your fishfinder; it's not just for finding fish, but for understanding the bottom contour. Look for subtle changes in depth, drops, humps, and areas where hard bottom meets soft. These are the places fluke love to stage.
- Utilizing Current and Wind: Both current and wind will dictate your drift. Often, a "controlled drift" is best, using your boat's engine in reverse or forward at a low RPM to slow down or direct your drift. This is where a bow-mounted trolling motor with GPS "spot-lock" capabilities, like a Minn Kota or MotorGuide, can be a game-changer, allowing you to precisely control your speed and direction over a hotspot. Without one, you'll need to use your main engine to "kick" the boat in and out of gear to maintain a good drift. In areas with strong tides, plan your trip to coincide with the beginning or end of the current, often known as "slack tide," when the drift might be more manageable. However, many experienced anglers believe fluke feed most actively when the current is running, so finding the right balance is key. If you’re fishing a strong current, you may need a heavier sinker to stay on the bottom. You can check out Best Time to Fish for Fluke at Slack Tide for more detail on how current impacts your fishing.
- Reading the Bottom: This is critical. As your sinker drags along, you'll feel different textures through your rod. A soft thud might be a mud bottom, a light ticking could be sand and gravel, and a sharper bump or grind is often rock or shell. Learn to differentiate these. When you feel a change, especially from soft to hard, be extra alert – that's often where fluke are hiding. Using a fishfinder is invaluable here, showing you the contours and breaks in the bottom that could hold fish.
Hook Set, Fight, and Landing Your Catch
The moment of truth! Feeling that subtle tap or aggressive thud is exhilarating, but getting the fish to the boat requires skill and patience.
- The Fluke Bite: A fluke bite can range from a delicate "tick-tick" as it mouths the bait to a solid "thump" that nearly pulls the rod from your hands. Don't be too eager to set the hook on the first subtle tap. Fluke often "chew" on the bait, trying to reposition it before fully committing. Give them a second or two to really engulf the bait. This might mean lowering your rod tip slightly or simply waiting for a more definitive pull.
- Setting the Hook: Once you feel a solid pull or the rod loads up, it's time to set. With braided line, a sharp, upward sweep of the rod tip is usually all it takes. You don't need a massive, arm-stretching hook set. Just a firm, smooth motion to drive the hook home. Because fluke have flat, wide mouths, a good hook set ensures the hook finds purchase in the corner of their jaw.
- Fighting the Fluke: Fluke are strong for their size, especially larger ones (the "doormats"). They'll often make powerful runs, especially when they first feel the hook. Keep a steady bend in your rod and maintain constant pressure. Don't pump the rod too aggressively, as this can cause the hook to pull free from their softer mouth tissue. When they get close to the boat, they often make a final, powerful dive. Be ready to give line if necessary.
- Landing the Fish: For smaller fluke, you might be able to swing them directly into the boat if your line and rod can handle it. For larger fluke, especially anything over 3-4 pounds, a net is your best friend. Always use a net when landing a sizable fluke. Trying to lift a large fluke directly by the line or leader can result in a lost fish or broken tackle. Slide the net under the fish head-first, lifting smoothly. Be mindful of their sharp teeth – they can deliver a nasty bite! Remember to check Connecticut Fluke and Summer Flounder Regulations before you head out, so you know exactly what the size and creel limits are.
Armed with the right rigs and a solid understanding of fluke behavior and fishing techniques, you're well on your way to a successful day on the water. Experiment with different baits, colors, and retrieve speeds. Most importantly, enjoy the process, and tight lines out there!
Disclaimer
Fishing regulations, license requirements, and local conditions can change frequently. Always consult the official Connecticut Department of Energy and Environmental Protection (DEEP) website or current fishing guide before heading out to ensure you are in compliance with all applicable laws and safety guidelines. The information provided in this guide is for general informational purposes only and should not be considered a substitute for official regulations or professional advice.