Best technique for vertical jigging for fluke
There's nothing quite as frustrating as knowing fluke are in the area but struggling to entice a bite with a slow drift. Sometimes, those big summer flounder get a bit finicky or hold tight to structure, making traditional tactics less effective. That's where vertical jigging swoops in as a game-changer, offering a dynamic and often incredibly productive way to target these delicious flatfish. This guide is all about helping you unlock the secrets of vertical jigging for fluke in Connecticut's varied waters, transforming those tough days into successful outings by arming you with the right techniques and gear.
Understanding Vertical Jigging for Fluke
Fluke, also known as summer flounder, are fascinating creatures. They're masters of camouflage, lying in wait on the bottom, perfectly blended with their surroundings, ready to ambush unsuspecting baitfish or crustaceans. While a slow, baited drift can certainly be effective, vertical jigging offers a more aggressive and controlled approach that often triggers reaction strikes from these cunning predators, especially when they're holding tight to specific structures or in areas with stronger currents.
Why Vertical Jigging Works for Fluke
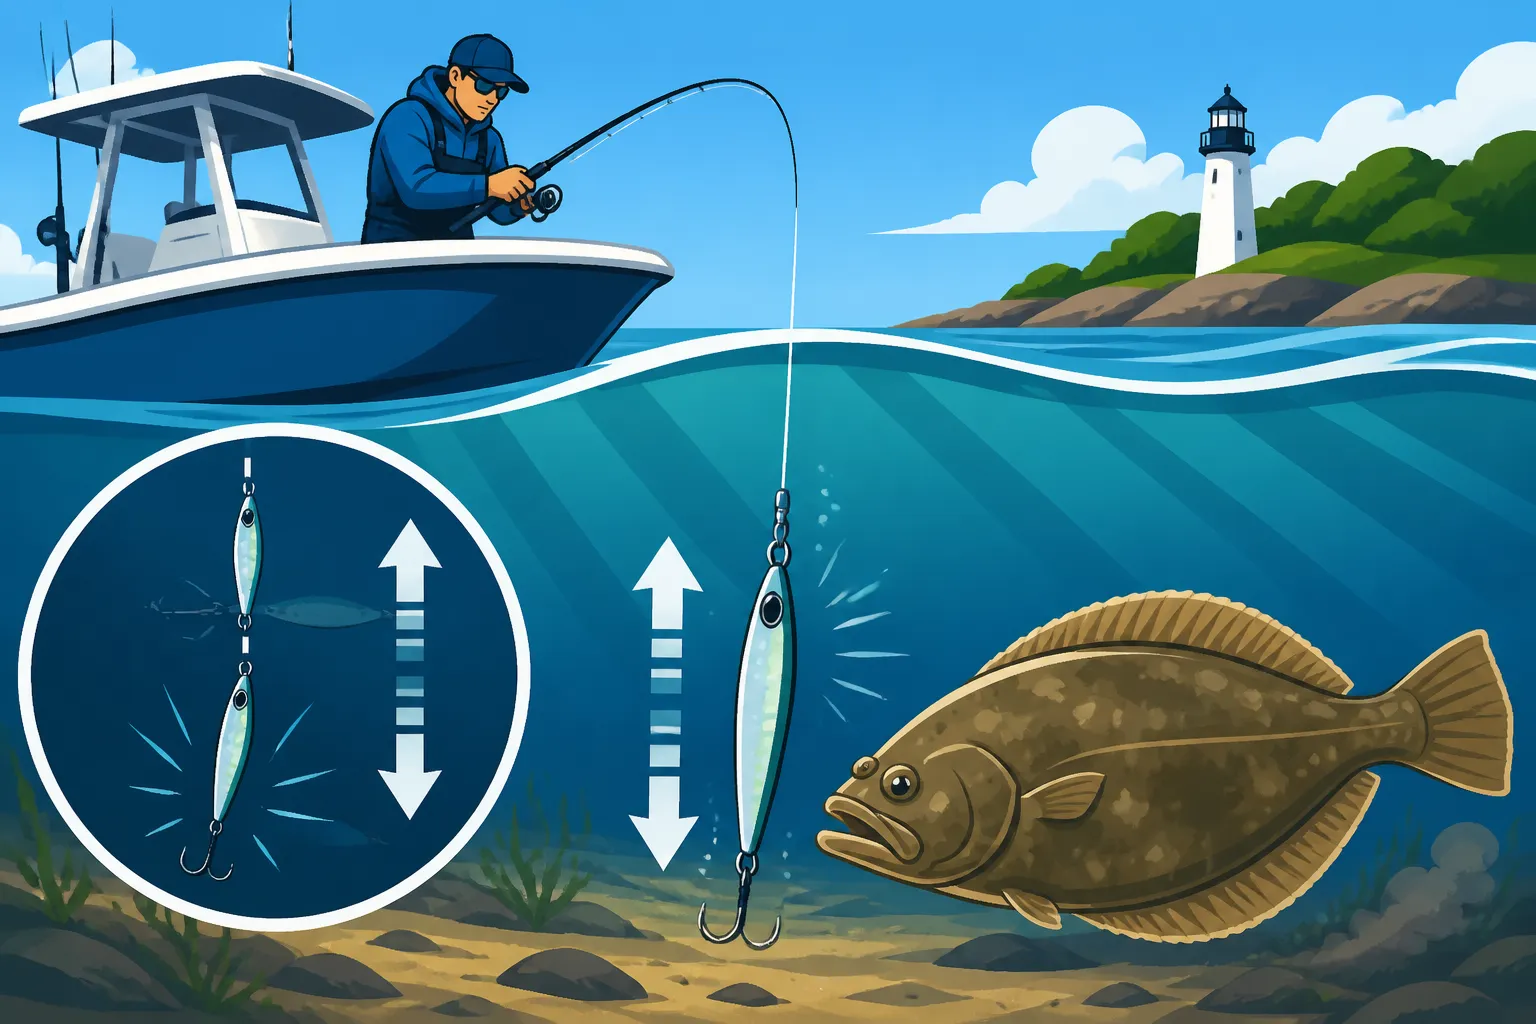
Vertical jigging taps directly into the fluke's predatory instincts. A jig, when worked correctly, mimics an injured or fleeing baitfish, or even a scurrying crab. This erratic, darting motion often proves irresistible, particularly to larger, more aggressive fluke that are looking for a substantial meal. Instead of waiting for a fluke to stumble upon your bait, you're actively presenting a tempting target right in their strike zone.
One of the biggest advantages of this technique is the ability to precisely target specific pieces of structure. Imagine your sonar lighting up with a promising rock pile or a sudden depth change. With vertical jigging, you can hover directly over that spot, presenting your lure exactly where you believe the fluke are hiding. This level of control is simply not possible with a passive drift, where you're at the mercy of wind and current, often pulling your rig off the key spot before you can even get a bite.
Furthermore, when fishing over areas with patchy bottom, like scattered rocks, shell beds, or even light weeds, vertical jigging often results in less snagging and fouling than a traditional long-leader drift rig. By keeping the lure actively working just above or gently bouncing on the bottom, you maintain better control and reduce the chances of getting hung up, allowing you more time fishing and less time re-rigging.
Key Differences from Traditional Fluke Drifting
It's easy to confuse all fluke fishing as just "drifting," but vertical jigging is a distinct approach. Traditional fluke drifting typically involves letting your boat move with the wind and current, dragging a baited rig (like a "fluke killer" rig with a spinner blade and squid strip) over a wide area. This is a more passive technique, designed to cover ground and present a natural scent and visual appeal to any fluke you pass over.
Vertical jigging, on the other hand, is an active pursuit. Your focus shifts from covering broad expanses to pinpointing specific structures and presenting a lure with intentional, controlled movements. This often means using a much heavier jig than you would on a drift rig, and employing precise boat control, perhaps using a powerful spot-lock trolling motor or making subtle adjustments with your main engine, to stay directly over your chosen target.
Another major difference lies in the primary attractant. While many anglers will still tip their jigs with a strip of squid or a Gulp! Alive bait, the action of the artificial jig itself is paramount in vertical jigging. The angler is responsible for imparting that lifelike motion, making the jig dance and flutter in a way that triggers a reaction bite. With traditional drifting, the natural bait and its scent play a much larger role, often leading to slower, more deliberate takes compared to the sometimes aggressive strikes on a jig. To learn more about how fluke behave, check out Fluke Habits in Long Island Sound.
Essential Gear for Vertical Jigging Success
Having the right tools for the job makes all the difference when it comes to vertical jigging for fluke. You're not just casting and reeling; you need gear that provides sensitivity, power, and the ability to handle the specific demands of jigging in varying conditions. Skimping here can lead to frustrating missed bites and lost fish.
Rods, Reels, and Line Choices
For a successful vertical jigging setup, your rod is your primary sensor. Look for a medium-light to medium power rod, typically between 6'6" and 7'6" in length, with a fast or extra-fast action. The fast action is crucial because it means the rod bends mostly in the tip section, allowing for sensitive bite detection and quick, powerful hooksets. Graphite rods are generally preferred over fiberglass for their superior sensitivity, letting you feel every subtle bump, tap, or change in bottom composition. A good, sensitive rod can be the difference between feeling a gentle fluke mouthing your jig and simply thinking you've snagged the bottom. You can find excellent options for sensitive graphite rods and smooth spinning reels on Amazon, ensuring you have the right tools for detecting subtle fluke bites.
When it comes to reels, you have a couple of solid choices. A high-speed spinning reel in the 2500-4000 size range is popular for its ease of use and quick line retrieval. Alternatively, a small, lightweight conventional reel can offer even more direct feel and winching power, which some experienced jigging anglers prefer. Whichever you choose, ensure it has a smooth, reliable drag system, as even average-sized fluke can make surprising runs, and you don't want to snap your line.
Line choice is critical. Braided line, typically in the 15-30lb test range, is the undisputed champion for vertical jigging. Its near-zero stretch provides unparalleled sensitivity, allowing you to feel the jig's action, bottom contact, and those subtle fluke bites. It also offers superior strength for its diameter, cutting through the water better than monofilament and helping you stay vertical. Always pair your braid with a fluorocarbon leader of 20-30lb test. Fluorocarbon is less visible to fish, highly abrasion-resistant (a must when fishing around rocky structure), and offers a bit of stretch for shock absorption. Connect your braid to your fluorocarbon leader using a strong knot like the FG knot or a double uni knot, ensuring it's smooth enough to pass through your rod guides without snagging.
The Art of Jig Selection and Tipping Baits
The world of jigs for fluke is vast and exciting. The most popular choice, and often the most effective, is the classic bucktail jig. These jigs, made with deer hair, pulsate in the water, perfectly mimicking baitfish or even a shrimp. Colors like white, pink, chartreuse, and natural baitfish patterns (olive, grey) are go-to options. Beyond bucktails, soft plastic paddle tails rigged on lead jig heads are also incredibly effective. Brands like Berkley Gulp! Alive offer soft plastics infused with powerful scents that fluke find irresistible. Diamond jigs or other slender metal jigs can also be effective, especially in deeper water or strong currents, as they sink quickly and have a tight, flashing action.
The weight of your jig is paramount and depends entirely on the depth you're fishing and the strength of the current. You need just enough weight to maintain a vertical presentation, feeling the bottom with each drop, without being so heavy that it looks unnatural. This might mean using a 1/2 oz jig in calm, shallow water, but quickly moving up to 2 or 3 ounces, or even heavier, when fishing deeper channels or during a strong tide run. Experimentation is key, and it's always wise to carry a variety of weights in your tackle box. For specific guidance on weight selection, consider the advice in Best jig weight for fluke drifting.
Finally, tipping your jig is almost always a good idea and can significantly increase your strike rate. While the jig's action is key, adding a bit of scent and texture can seal the deal. Popular tipping options include a strip of natural squid, a spearing, a killifish, or perhaps the most popular and effective, a piece of Berkley Gulp! Alive bait (like a swimming mullet or grub). The combination of the jig's enticing action and the added scent and visual appeal of natural or scented artificial bait creates an irresistible package for hungry fluke.
Mastering the Vertical Jigging Technique
Vertical jigging isn't just about dropping a lure over the side; it's a dynamic interplay of reading your environment, understanding fluke behavior, and executing a precise retrieve. Getting it right can turn a slow day into a banner day, but it requires attention to detail and a willingness to adapt.
Reading the Conditions and Locating Fluke
Before you even drop a line, understanding where fluke are likely to be is half the battle. Fluke are ambush predators that prefer to lie in wait, so they gravitate towards structure and current breaks. Think wrecks, reefs, rock piles, sudden depth changes along channel edges, mussel beds, and even subtle depressions in the sandy bottom. These spots provide cover and create eddies where baitfish gather, making them prime hunting grounds for fluke. Best rig for bottom fishing for fluke often discusses how to effectively fish these structures.
Tides and current are also incredibly important factors in fluke fishing. While some fish bite better during slack water, fluke generally prefer moving water, whether it's an incoming or outgoing tide. The current brings bait to them, and they'll position themselves facing into it, ready to pounce. However, too strong a current can make it difficult to maintain a vertical presentation and can push bait too quickly past them. Your fishfinder (sonar) is your best friend here; it’s invaluable for locating these structures, marking baitfish schools, and even identifying individual fluke holding tight to the bottom. Side imaging technology can be a game-changer, revealing holding areas off to the sides of your boat that traditional down-sonar might miss.
Imagine you're cruising over a known fluke ground, and your fishfinder suddenly shows a jagged line indicating a rocky reef or a sharp drop-off into a channel. This is your cue! You'll want to position your boat so that you can drift or hold directly over, or slightly up-current from, that structure. This ensures your jig spends the maximum amount of time in the strike zone. If you see bait schools congregating near these structures, that's an even stronger indicator that predatory fluke are likely present and actively feeding.
The Drop, the Lift, and the Strike
Once you've identified your target area and are positioned, it's time to deploy your jig. The key is to get your lure to the bottom quickly and efficiently. Free spool your reel, letting the jig drop unimpeded. As soon as you feel it hit the bottom – usually a distinct thump – immediately engage your reel. This is vital to prevent too much slack line, which can lead to tangles, missed bites, and an inability to feel the subtle action of your jig.
Now for the "jig" itself: the lift. This is typically a sharp, upward snap of your rod tip, moving it anywhere from 6 to 18 inches, depending on the desired action and conditions. This initial snap makes the jig dart upwards, mimicking a fleeing baitfish. Immediately after the lift, lower your rod tip in a controlled manner, allowing the jig to flutter and fall back towards the bottom on a semi-slack line. The bite often occurs on this fall, as the jig appears injured and vulnerable. Repeat this sequence, maintaining constant contact with the bottom. Jig once or twice, then let it settle for a moment, then repeat. You should constantly be trying to "feel" the bottom, gently bumping it with your jig.
The strike from a fluke can range from a subtle tap, a sudden increase in weight as if you've snagged something, or sometimes your line will just stop falling before it reaches the bottom. It's crucial not to dismiss these subtle sensations as mere bottom contact or snags. When you feel anything out of the ordinary, set the hook immediately with a firm, sweeping motion. Because fluke have relatively hard mouths, a solid hookset is essential to properly embed the hook. Missing these subtle bites is one of the most common pitfalls for anglers new to vertical jigging, so pay close attention to the feel of your line and rod tip.
Advanced Tips and Common Pitfalls to Avoid
Vertical jigging for fluke isn't just a set-it-and-forget-it technique; it requires constant adjustment and a keen understanding of both your gear and the marine environment. Even seasoned anglers can improve their game by refining their approach and learning from common mistakes.
Adapting to Current and Depth
The biggest challenge in vertical jigging is maintaining that crucial vertical presentation, especially in ever-changing currents and varying depths. If your line is sweeping too far back from the boat, creating a large "bow" in the line, you're not vertical enough, and your jig's action will be compromised, making it harder to feel bites. The primary way to combat this is by increasing your jig weight. Always start with the lightest jig possible that still allows you to feel the bottom. If the current picks up, don't hesitate to switch to a heavier jig. For instance, in a strong tide over a deep channel, a 3-ounce bucktail might be necessary, whereas in a calmer cove, a 1-ounce jig could be perfect. The table below illustrates some common guidelines for jig weight selection.
| Current Speed (Knots) | Typical Jig Weight Range (Ounces) | Notes |
|---|---|---|
| 0 – 0.5 (Slack/Slow) | 1/2 – 1 oz | Light jigs, subtle presentation. Good for shallow water. |
| 0.5 – 1.0 (Moderate) | 1 – 2 oz | Most common range. Allows for good bottom contact and action. |
| 1.0 – 1.5 (Strong) | 2 – 3 oz | Heavier jigs needed to stay vertical. May require faster jigging. |
| 1.5+ (Very Strong) | 3+ oz | Challenging, consider switching to heavier diamond jigs or different spots. |
Boat control is another critical factor. If you're drifting, you might need to use your trolling motor or even make short bursts with your main engine to slow your drift and keep your line more vertical over your target structure. This technique is sometimes called "power drifting." In deeper water, a more vigorous and slightly faster jigging motion might be needed to attract attention, as the jig has more water to travel through. Conversely, in shallower, calmer waters, a more subtle, slower presentation with smaller hops can be more effective. Paying attention to these nuances will significantly improve your success. Remember, Jigging for Fluke in Long Island Sound often discusses these fine-tuning techniques.
Maximizing Your Strike-to-Catch Ratio
It's one thing to get a bite, another to land the fish. Several factors can influence your strike-to-catch ratio. First and foremost, always ensure your hooks are razor-sharp. Even the best jigs can come with hooks that need a little touch-up. A dull hook can slip out of a fluke's mouth, especially if it only lightly nips at the bait. Carry a hook sharpener and use it often, especially after catching a few fish or bouncing your jig off rocks. You can easily find compact hook sharpeners on Amazon to keep in your tackle bag.
Your drag setting is also paramount. Set your drag tight enough to achieve a solid hookset, but loose enough to allow the fish to take line if it makes a strong run, preventing a break-off. A good starting point is to set it so you can pull line off the reel with moderate effort. After battling a fish, always check your leader for nicks or abrasions. Even a small nick can significantly weaken your line, leading to heartbreak on your next big fish. It's a good practice to re-tie your leader after every few fish, or if you feel any roughness.
Patience and persistence are also key. If you're confident there are fluke in an area but aren't getting bites, don't give up too quickly. Vary your retrieve. Try different speeds, higher lifts, shorter drops, longer pauses. Sometimes, a slight change in presentation is all it takes to trigger a bite. Also, pay attention to the exact tide stage. While moving water is generally preferred, sometimes the bite can turn on during the transition periods or even on a slight lull in the current. Understanding specific regulations, such as those covered in Connecticut Fluke and Summer Flounder Regulations, is also crucial for a successful and legal outing. Don't forget to consider Best time to fish for fluke at slack tide as sometimes that window can produce.
Disclaimer
This article is for general informational purposes only and does not constitute professional advice. Laws, prices and regulations vary by location and change over time. Consult a qualified professional for guidance on your specific situation.